Assignment 1: Workflow
Introduction
Workflow is not a new concept to me, it is something that is a routine part of my working life, however, this is the first time that I have sat down and documented the processes I use in the creation of a photograph. I have always been conscious of following a distinct and carefully thought out approach to my image making, particularly when dealing with the more technical aspects such as underwater or studio based macro work. I know from experience what happens when workflow fails; I have dived to a depth of 30m or more and discovered that I have omitted to load a CF card into my camera or left the lens cap on. In such cases I end up with a novel shaped diving weight and an hour to reflect upon my stupidity before surfacing. This has led to a careful systematic approach to setting up my camera for such circumstances; test everything both functionally and structurally before putting it in the ocean, salt water is very unforgiving of camera equipment.
Hence, I view this as a very valuable learning exercise and one that I can immediately apply to much of what I do with a camera. The first step in working up this assignment was to establish a suitable theme that I could design the workflow around. Recently I have been working on assignment 3 and 4 for People and Place, striving to create interesting images of how people interact with and use buildings and space. I have tried to drive towards an approach that verges on Social Documentary, looking always to either include people in the shots or to make a statement on the way that people influence urban landscape. At the same time I began to develop a desire to create some photographs with a greater emphasis upon the buildings than the people occupying them, a mix of architecture and urban landscape, rather than the street style I adopted for PaP.
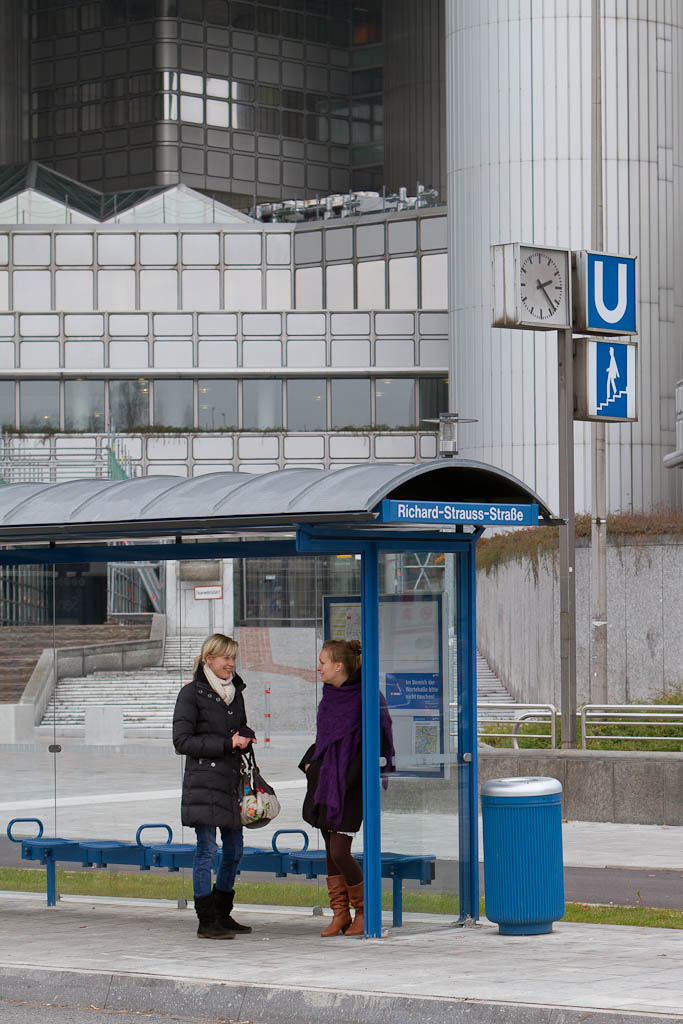
Subsequently I am presenting as the subject for this assignment 8 photographs of commercial buildings in my immediate neighbourhood. I live on the east side of the city of Munich close to Richard-Strauss-Strasse. On the west side of this major street are residential buildings (where I live), on the east is a series of old and new office/shopping developments. I have constrained myself by limiting my equipment to a single camera and single lens, a full frame Canon 5DII and a 24mm tilt-shift prime. The tilt-shift lens is ideally suited for this kind of work allowing perspective correction, but the lack of autofocus, the failure of metering when the lens is shifted, and the requirement to use the lens tripod mounted, call for the application of a carefully thought out workflow.
My intent was to capture some interesting images and at the same time thoroughly test the workflow that I have devised for this assignment. I have divided the workflow (see attached document) into 4 distinct stages: Preparation, Shooting, Processing, and Finishing. Within each I have defined a number of steps and built a flow chart to diagram the workflow. In total I have 19 steps in the workflow, although each contains several activities, it is at this step level that I will describe how the activity progressed.
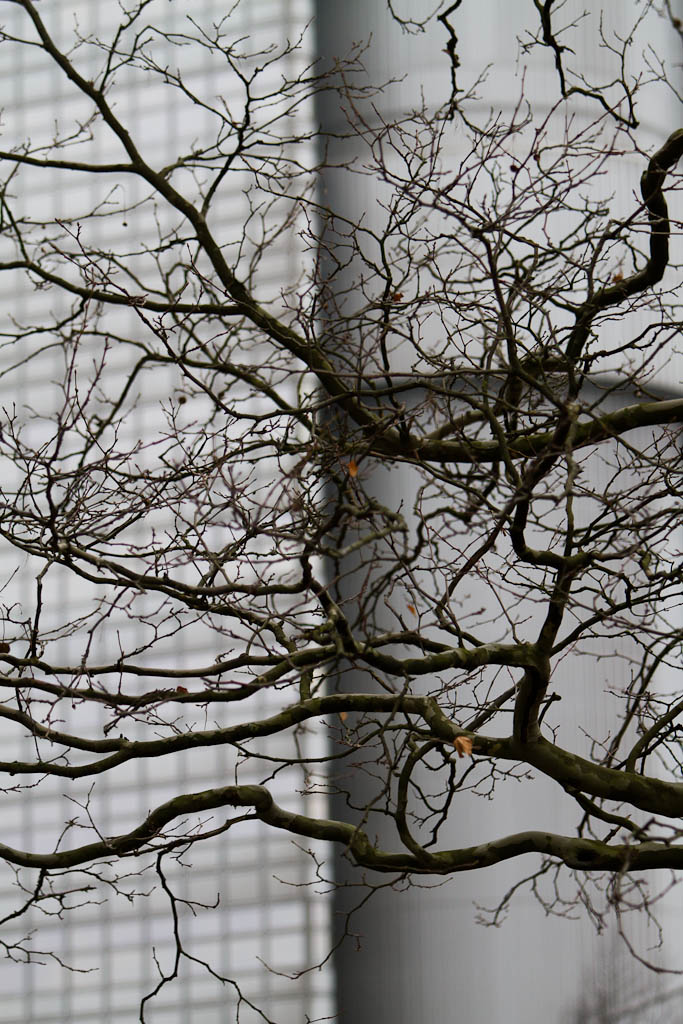
The photographs were taken over a period of two weeks and were selected from 6 separate shoots. I have documented each shoot on my blog. Recently I have been looking at photographs from the Düsseldorf School and in particular Bernd and Hilla Becher, and their one time pupil Andreas Gursky. In this work I have not tried to directly emulate their style, but find that their approach to photographing industrial and commercial landscapes has led to a desire to work in this slower way with a perspective controlling lens and to look for large imposing subjects to capture. However, I have to say that for the time being, at least, I plan to stick with 35mm Digital, the large format film cameras used by the Bechers are a little beyond me at present.
The Workflow
Preparation
1. Research: Wikipedia supplied much of the information that I have used to plan the images and learn about the subject, although a chance encounter with a very talkative resident filled in some of the missing information. I did less prior research for this assignment than I would normally, partly because the area is one I live in and is very familiar to me. I try to thoroughly research any prolonged shoot, it saves time and frequently the subject has been photographed before and it is possible to get guidance on how to approach in advance.
2. Select Location and Timing: Once I had decided upon the local office buildings as a subject the timing worked itself out. The buildings largely face east and west, however, there is much more space to the west of the buildings, as I can use the street area, to the east is a heavily wooded park. This meant that I needed to shoot from the west and with a low Sun behind me meant shooting from around 2pm-4pm for daylight, and between 5:15 and 5:45 for twilight.
3. Select Equipment: This was simplified by the limited equipment choice and the fact that much of what I was photographing was close to my home. The less than 10 minute walk meant that I could actually mount the camera on the tripod and carry it this way, with extra batteries, cards and other items in my coat pocket. This is not my normal approach, but in this case made sense. Luckily the weather was good and I needed no special clothing or protection for the camera. For the buildings a little further away I carried a rucksack in case I needed to put the camera away.
4. Prepare Equipment: As with item 3, no major issues, although once I managed my usual trick of not formatting the CF card before leaving the house. I standardized a while ago on 8GB cards, which hold around 280 images. With the TS lens I shoot very slowly so had room to spare. But, NOTE TO SELF, remember to always check memory cards before going out the door.
5. Travel to Location: In this case: walk. I include this in my workflow as it is important to plan the travel, no use heading to the tube station and finding the system is on strike again (Munich is as bad as London in this case). I also do much of my work in the city, so public transport is the norm. If a photograph is time critical it is key to know how long it will take to get to the location.
Shooting
6. Scout Location: Prior to taking any photographs I walked around the area and looked for interesting angles or where the light was best. For the current assignment this was particularly important as visualizing the shots took some time and the light was particularly strong due to the low winter sun. On one of the locations I had previously been challenged so I also tried to ensure that I was either on public ground or that there were no “official” looking people around.
7. Prepare the Camera for Shooting: With the Tilt Shift this takes some thought, the camera must be in Manual exposure mode and to avoid any shake when hitting the shutter I used a 2s delay on the shutter – this proved simpler than using a cable release. I always shoot in RAW and for this type of subject matrix metering was fine. I would always start with ISO 100 and f/11 or f/16, but these occasionally needed adjustment.
8. Shooting:
- During this assignment I must have gotten some strange looks as I would walk around with a camera up to my eye attached to a tripod. I am not yet able to judge very well what a 24mm wide shot looks like so take quick peeps through the viewfinder as I look for a location to shoot from. As I was shooting from a tripod and adjusting every shot individually this permitted and indeed forced me to think carefully about each shot and what I wanted to get from it.
- Getting the camera level was straightforward; I have a good ball mount tripod head and a small hot shoe spirit level that I attach to the camera. One learning point in using the TS lens was not to get the camera always perfectly level. The human eye expects some convergence of vertical lines and so I found that I tilted the camera just a little before imaging taller buildings. Otherwise the shot looked unnatural.
- Metering is tricky using such a lens as the meter must be read prior to shifting the lens, the shifted lens throws off the in camera meter by 2 or more steps depending on the degree of shift. I could have used an external meter, but found that I was able to compensate. I also found that the cameras metering was not too reliable for the brightly reflecting buildings against a blue sky, so I found myself carefully checking the histogram and bracketing some of the images.
- If the shot was not possible without going to Bulb, I would increase the ISO or increase the aperture to bring the shutter speed to 30s or less. This was only an issue for the night shots. Also on the night shots, choosing when to shoot was important and determined to what degree I had light trails from the traffic in the shot.
- Once exposure was set I would make final small adjustments and shift the lens for the framing I was after. At this point I would also refine the manual focus prior to hitting the trigger.
- A final review of the image in the LCD display and a go-no go decision.
Processing
9. Post Shooting Activities: Whenever I get home from taking pictures, I always look to my equipment first; taking care to make sure it is clean and dry before putting away in its cupboard. All of my equipment has a predefined home and is always where I expect it to be – I would go mad otherwise. I do this whilst uploading the images to my editing computer.
10. Preparing Images for editing: I work in the computer industry and used to have a technical job, so am very comfortable around computers. The one thing I used to guarantee any customer is that a disk drive will fail, high quality buys more time, but the drive will eventually fail. Subsequently I have duplicate drives for everything that I care about, my photographs live on a pair of external 1TB USB drives, each backed up to another 1TB. When I import photographs I use the facility in Lightroom to import directly from the CF card and make a separate copy to each drive. At the same time I label each shoot in a meaningful way combining date and subject – e.g. 101116 Bogenhausen. I do not key word my images, I should, but have yet to work out a system I like for doing this.
11. Editing: For this assignment editing was somewhat easier than on others, primarily due to the fact that using a slower more deliberate workflow meant that I shot far fewer frames. However, I followed my usual step wise refinement of selecting images to a Quick collection that is then stored as a permanent collection in Lightrooms catalogue. At each step of the process I would refine down and create a new collection that contains what I consider at a given time to be my submission set. During this process my vision of what I wanted to present changed somewhat, moving to 8 distinct images, rather than 4 groups of 3 images.
12. Processing: Once I selected those images that I wanted to place in my blog and which might ultimately become part of the submission, the next step was processing. Once again I do all processing in Lightroom, except for final print preparation. The non-destructive workflow suits me very well. For this assignment most of the adjustments were to Contrast and Colour Saturation, the camera handled the white balance very well. The biggest problem I currently have is a dirty sensor on my 2 year 5DII (it has never been cleaned), so a small amount of work was needed with the healing brush. I need to figure out how to clean the sensor myself or hand the camera in for cleaning.
13. Update Blog: After every shoot for an assignment I make a blog entry highlighting the images I liked and commenting on the process. As a result my blog contains many images, for a photography course I feel that the blog should be as much a visual as a written account of what I do. To prepare images for web I use Lightrooms export facility, choosing medium quality JPEG, 1024 pixel dimension and medium sharpening for screen.
Finishing
14. Conceptual Considerations: Whenever preparing a large number of images for any sort of use, the final selection can lead me in a slightly different direction. Whilst the initial concept drives the taking of photographs the results can then influence the final outcome. As mentioned before, the images I captured caused me to rethink my initial concept, moving from a series of visual studies of individual buildings to more of a documentation of the commercial urban landscape in my neighbourhood. At this stage all the images turned out to be in landscape format, providing a common visual look, but one well suited to the 24mm focal length.
15. Final Edit: My original concept called for 12 images, 3 from each of four buildings. At this stage I decided this was too many and so edited down to 8 photographs, removing some and introducing others that worked better with the new concept and added some visual variation.
16. Re-Shoot: In this case, I returned a couple of times to one building taking advantage of different light and in once case improving the framing of an image, getting much closer than I had before. As all of the buildings were relatively close to one another I could take advantage of a shoot and make a short detour to refine an image.
17. Final Processing: At this stage I became very concerned about ensuring that my final output form matches my vision and what I was looking at on the primary screen of my computer. I calibrated the main screen using a Spyder 3; this gives me good results when printing, although I have to keep in mind that prints always look darker than screens . When the screen was where I want it to be I went through the images again, making small tweaks to the photos. The web based images were exported once more as medium quality JPGs as are the images that will accompany this document as part of my submission. For printing I export as 16 bit TIFFs to preserve as much image data as possible.
18. Printing: I move to using Photoshop CS4 as I much prefer the printing interface. I crop each image and add a white border in CS4 so that I can print A4 borderless which I find creates the most predictable results. I felt that the subject for this assignment would work well with Glossy paper and so loaded HP Advanced Glossy Photo Paper, ensuring that the print profile was correctly selected and that the printer knew that CS4 would be managing the colour. This is the step that sometimes fails when I print directly from Lightroom, somehow I often get the wrong colour profile, so use CS4 as I know that this works, plus I have more control over cropping.
19. Web: For this assignment I am simply placing the images into my online blog, my web site is currently down and needs to be completely redeveloped and a new hosting company selected. This is a job for the long winter evenings and fits well into this course. I will also post the images to Flickr and the OCA Student Site.
Workflow – Closing Comments
This workflow is orientated towards outdoor landscape/architectural photography and would need to be substantially modified for other projects. The Preparation and Shooting stages should be quite specific to the subject or project, whilst processing and finishing are somewhat more generic. In my own photographic practice there are 3 other types of photography that would substantially modify this workflow:
Wedding/Events: I have shot 3 weddings for friends and here workflow is critical. Preparation needs to be very much more focused around the single opportunity nature of the event, all equipment needs to be checked and backups for everything prepared – myself included (my wife is pretty good with a camera and works as second shooter). Access is a major concern, talking to the couple and the officials up front is essential, does the bride want pictures of getting ready, can I use flash, at what time does each stage happen, … Each hour of the day needs to be planned for with a list prepared of what I will shoot and when. I actually kept this in my pocket and ticked stuff off as I went. Finishing depends upon what the couple want, as a minimum I provide a DVD with JPG’s and create my own wedding album photobook using Blurb as a gift. If they want prints I then charge for the materials involved.
Diving: The workflow for underwater photography is very similar to what I have described above, in fact this is pretty much based on my scuba workflow. The key differences are in preparation. Deciding on the lens to use requires discussion with the dive master, the decision is basically wide angle or macro, each requires a different port on the camera housing. Testing is also critical, I shoot a frame to check that both external flash guns are connected and working properly, check that the lens gear is coupled if using a zoom lens, and then drop in a tank of fresh water to check for leaks (a little fresh water will not generally harm a camera. Underwater shooting is no different to above water, the same issues apply, with the added complexity of floating in 3D space and possibly contending with current. After shooting the disassembly and cleaning stage are more rigorous and before I do anything the camera is cleaned and all batteries are on chargers.
Studio: I enjoy macro work and recently have been doing some portraiture. The workflow here is complicated by the addition of lights, either battery operated speedlites or small studio monoblocks. Getting the lighting right is the hard part and becomes the largest element in the workflow. For macro work I frequently shoot with the camera tethered to my computer, meaning that I can remotely set exposure and fire the camera. This has the great advantage of being able to preview the shot on my monitor and then capture the image directly into Lightroom without using a CF card.
I suspect my workflow is somewhat more involved than many people might use, but I am a methodical guy and enjoy the planning/preparation almost as much as the shooting. I very rarely simply take a camera and walk out the door to see what I can find. I generally know what I am looking for, but am also happy to be surprised. In underwater photography I practice pre-dive visualization, before going in the water I already have in mind a number of shots I would like to create, I then look for circumstances that permit me to do that. This greatly improved the images I was capturing. I now apply this to all shooting.
The Photographs
DPP1-1
24mm TS-E, f/16, 1/90s, ISO 100
For the first photograph, I wanted to provide a broad view of the area in which I would be working. The tall building to the back is the Hypo Vereins Bank headquarters, in front of it is the Münchener Bank HQ and next to it on the right a mixed office and retail development. The point from which I have taken the photograph used to be a major 6 lane ring road. This road has been buried and the street is being remodelled as a normal two lane road, some areas of which are still a little overgrown. I took advantage of this to juxtapose the wild scrubby growth against the pristine steel and concrete buildings behind. The image is a compromise, moving to the left would have produced a better framing and eliminated the uglier brown building to the right of the frame, but at the expense of losing the daisies.
DPP1-2
24mm TS-E, f/16, 1/90s, ISO 100
Moving closer to the office/retail area I carefully sited my camera to create a very geometrical shot. The line of steel bollards creates a barrier to entry into the space below the arch. This image contains strong symmetries, but also elements that break them. It is also very impersonal, there are people in the image, but they are deliberately small, I wanted to include people but for them to be diminished by this glass and steel world. Time of day was critical for this photograph; with the sun too high the shadows become very strong, although this might also be interesting. With the sun low, buildings behind me start to cast shadows. I am standing on the shadow line as I take this photograph.
DPP1-3
24mm TS-E, f/16, 1/45s, ISO 100
Walking up the ramp on the side of previous photograph, a roof space is encountered within which is laid out a small garden for the office workers to enjoy when taking a break. Within this space are a number of small buildings and openings that drop down to the shopping centre below. I composed this photograph with very strong perspective lines to stress the modernity of the environment I was in. This might be a little too hard, stepping back a few paces would have added more foreground and diminished the starkness of the image. I still find it difficult to decide this type of compositional question, all I can say is that this framing interested me more.
DPP1-4
24mm TS-E, f/16, 1/125s, ISO 100
Moving to the north I now shift my attention to the Hypo Vereins Bank building, the “Hypo-Haus”. This building features in 3 of my selected photographs, it could have been in all of them such is the strangeness of the architecture. Completed in 1981 this 114 meter high building dominates Munich’s eastern skyline. There are very few high buildings in Munich as it is forbidden in the city centre to disturb the historical skyline, thus tall buildings really stand out. With this particular shot I did not want to frame solely the building, but to place it into the context of the surrounding street furniture. The row of bicycles suggests that not all that is modern and steel dominates the life of this neighbourhood. With this image, I think I got the shift slightly wrong and the building has a bit of diverging verticals about it. I think this mistake has served to make the building look even more ominous than it really is, so maybe not such a bad thing.
DPP1-5
24mm TS-E, f/16, 1/90s, ISO 100
This is a much older building, probably built in the 1960’s and housing a number of local businesses and doctors surgeries. It is a couple of hundred meters south of the previous shots and in a very different style. Here I have gone for a fairly straightforward perspective shot. This photograph would have been improved by the presence of a few more people emphasizing that it is a building used by the community, not simply an office block.
DPP1-6
24mm TS-E, f/11, 0.3, ISO 100
This photograph has a very different style and structure to the first 5. The subject is a small shopping plaza with the Arabella High-Rise building forming the background. It is a massive slab of concrete rising out of the Arabella Park development with a mosaic like curtain walling adding texture to any photograph. The sky was very grey on the day I was there so I decided to omit it from this image and subsequently have created a far more intimate view of the city than the previous images. Stylistically it does not sit as well with the other photographs, but from a documentary viewpoint illustrates a different style of building. I have been experimenting with photographs containing limited perspective, with depth created by horizontal layers of receding content, this is a half-way house to that idea.
DPP1-7
24mm TS-E, f/16, 10s, ISO 100
For this photograph I have returned to a similar viewpoint to the one I used for DPP1-4, however, later in the day just after sunset. I have moved closer to the bank HQ reducing the amount of foreground which would be almost black in any case. I have selected a time of day and exposure that tried to balance the artificial light with the reflection of the low Sun on the upper part of the building and yet retain the deep blue of the sky. This took a few attempts and careful bracketing of exposure. Ideally I would like to have avoided the car lights in the foreground for this particular image, but the time of day and need for a longish exposure meant that was not really possible. Higher ISO and wider aperture might have helped, but at the cost of a drop in resolution.
DPP1-8
24mm TS-E, f/22, 30s, ISO 200
12 minutes later I moved position and with the last of the twilight set about photographing this glass clad building. This time I had no chance to eliminate the light trails so selected a framing and timing that emphasized them as a dynamic element of the composition. I have tried to keep some detail in the crane above the building, my lens was not wide enough to include it completely and had I done so would have made the building too small within the frame. I particularly like the way that the lighting inside the building has created blocks of yellow light that contrast well with the deep blue of the sky and the red/orange of the cars passing by. I think I would have achieved a better photograph using the same light as in DPP1-7, which would have offered more detail of the crane, however, the camera is pointing West here and so I would have lost much of the colour in the sky.