Thursday, June 2, 2011

Ex. 24 Sharpening for Print

Sharpening has been a process I have wrestled with since I first started dabbling with Digital Photography.  My early cameras were typically 3-5MP (my first was VGA! -1024x780 = 0.8MP) and had pretty basic optics.  At the time the images were still considered very good and a big improvement of film based point and shoot, however, sharpness left a lot to be desired.  As a result I found myself doing two things to the images, first applying an overwhelming amount of contrast and secondly over sharpening.  This created punchy, but not terribly refined images.

As time has passed I have backed away from this stance, looking for a more refined finish to images. Two things have helped in this process, the first is the improvement in workflow tools, with much better control over sharpening, in my case I use Lightroom and find the sharpening tool more than sufficient for my needs.  Secondly my cameras and particularly optics have improved.  My latest DSLR, the 21MP Canon 5D Mark II coupled with a high quality prime lens produces images that are pretty much Pixel sharp out of the camera.  Of course this requires careful control at shooting to avoid Dof blurring or diffraction, caused by too low or too high an aperture.  However, the result is that I use far less sharpening in my final output, placing greater reliance on careful management of contrast and colour to emphasize detail in images.

Sharpening, does have a use, in particular when preparing images for web.  In this case I frequently use the sharpening option in the Export dialog of Lightroom.  This is not necessarily the most accurate, however, for large numbers of images where I am not attempting to achieve the ultimate quality I find it more than adequate.  As the text suggests, the degree and refinement of sharpening depends on where the image is headed, for Flickr defaults are fine, for an A3+ print headed for the gallery wall I would be far more circumspect.

The subject also influence sharpening, a portrait needs far greater care and management of the process to avoid adding graininess to the skin when trying to sharpen hair detail. An underwater image of a spiny creature is completely different and can have a far greater application of sharpening, indeed it probably needs it.  Water softens images.

Turning to this exercise, as suggested I have selected a portrait as the target for the sharpening:


This image combines hair detail, eye detail, skin and large amounts of negative space, hopefully a good candidate for the tests.   The image was captured using a 135mm prime lens set at f/8 and using studio lighting.

First of all I have imported the image into Lightroom and applied a number of contrast and colour adjustments.  I have then made 4 virtual copies of the image and applied differing degrees of sharpening.  As with most advanced editing tools Lightroom offers many parameters to the sharpening process, creating a 4-dimensional space of possible options.


To keep things things simple I have left all settings at the default and simply used the "Amount" slider to change the degree of sharpening, setting it to 0, 50, 100, and 150, spanning the full range of adjustment.  When sharpening an image for final output I would also adjust the Noise Reduction and masking to avoid graininess in the image.  As such this is a very simple approach to sharpening, but should serve to illustrate the different impact of sharpening settings.

After adjusting the images in Lightroom, I exported them as 16 bit Tiffs and loafed them into CS4 for printing.  At this stage I enlarged each to 100% and took screen grabs of the area around the eyes to allow a comparison of the impact on the screen:

 0

50 

100 

150

The unsharpened image is visibly softer than the image with 50 set as the amount of sharpening.  At 100 the sharpening is starting to become too strong and is creating too much texture in skin, at 150 this effect is quite unpleasant.  Another affect of sharpening beyond 50 is a progressive lightening of the hair as the tool creates greater light-dark contrast.  This was not an expected effect for me, but is logical once I think about it.  It is interesting that the sharpening tool can also impact the contrast and colour of the image, food for thought.

Moving now to printed versions, the first question is what a full size print is.  This ambiguity is not untypical of the text in the course manual, but is not a problem.  I have printed two sets of images, the first a group of 4 prints on a single A4 sheet, so roughly 15x10 cm, and then 4 individual full size A4 prints.  I could have printed up to A3+, but that would have been both expensive and probably pointless.

First of all the print size makes a big difference, the 10x15cm prints exhibit very little difference, without knowing in advance which were sharpened I would struggle to know which is which.  At A4 there is a visible difference in the prints and again I find the lower sharpening setting of 50 to be the most satisfying visually.

What have I learned from this?  First of all the degree of sharpening very much depends on the size of the print, a small 10x15cm print cannot resolve much detail in any case, whilst an A4 print allows much closer inspection, A3 would be even less forgiving. I do not think this is a question of screen versus print, but a question of at what resolving power will the photograph be examined.  Factors outside the photographers control such as from what distance the image will be viewed will affect the apparent sharpness of the image. 

Secondly when working with a portrait the amount of sharpening must be very carefully managed, too much and the skin can lose its smooth quality, however, use of the other sharpening parameters such as Masking can mitigate this, as can use of the noise management tools.

Monday, May 30, 2011

Assignment 5: First Set of images

Having created a shot list I went ahead and captured photographs that met most of the items I had initially considered.

In total I completed 42 dives, each between 40 and 60 minutes, at depths up to around 26m.  Most of the dives were onto underwater reefs, i.e. islands of coral rising from a sandy sea bed at 26m to a depth of around 10m.  These reefs never break the surface, although over a period of 100's of years could eventually rise to the ocean surface and form islands.  This limited some of my photography, as red filter (for example) works poorly below 10m, but presented pretty typical shooting conditions and given the excellent coral quality and abundant fish life meant I had plenty to work with.

In total I shot just short of 3,000 underwater images over the 42 dives, plus a number of snorkeling forays in the lagoon.  This seems like a lot of images, but is only around 70 per dive.  It should be born in mind that any given subject requires several shots, bracketing exposure and also to get a moving subject into frame.  I split my shots between a 60mm macro lens and 10-22mm wide angle on a 1.6x APS-C sensor based camera.

Underwater photography has a number of interesting challenges, first of all anything more than 1m away will not produce a good image, hence the use of either macro or extreme wide angle lenses, both designed to enable shooting from as close to the subject as possible and external strobe lighting.  Changing lenses on a dive is no option, so it is important to decide early on what to shoot and then live with that choice, if a whale shark swims by when I have a 60mm macro mounted, tough.  Good camera handling skills are a given, you need to instinctively know what exposures work (manual mode is most common underwater) and how to position external strobes on jointed arms to avoid back scatter and provide adequate lighting to the subject small or large.  Finally you need to be able to shoot an image of a moving animal whilst also moving - excellent buoyancy control is essential to avoid damage to reef or self.  Any exposure is a 3 dimensional problem in light, position, and camera control that needs to account for the fact that the subject might be very poisonous and only a few inches away.

So, how did my experience match to my shot list:

1. Nudibranch (sea slug) (Shallow Dof) - I was quite pleased with this one, soft colour and the animal is not fully visible leaving some mystery in the shot


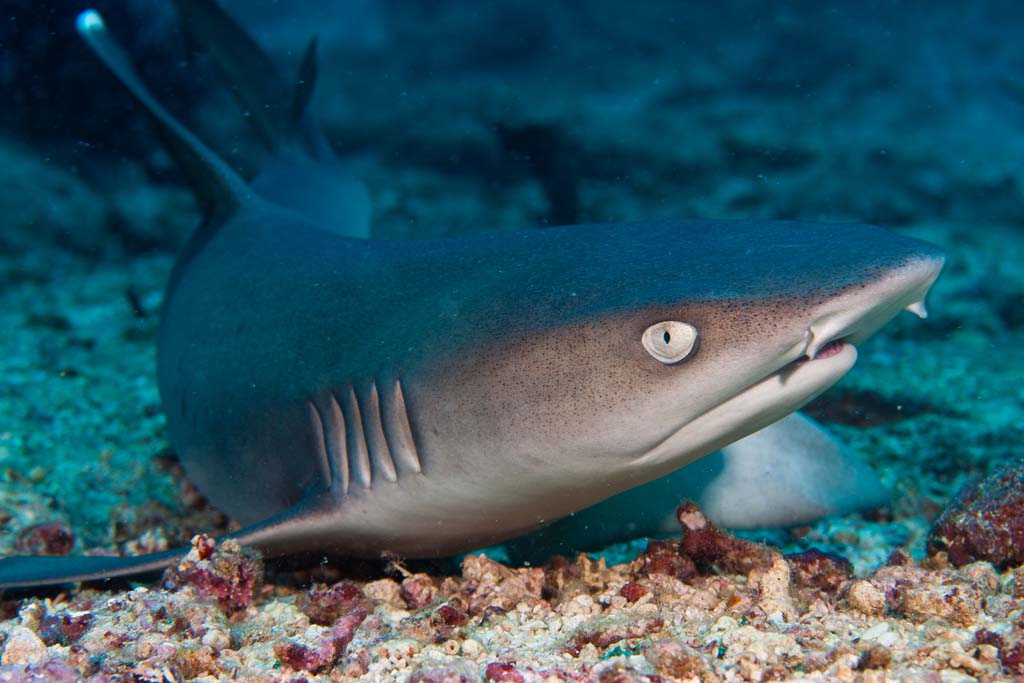
 2. Shark in shallow water, perhaps as a B&W image - Processing to B&W really helped me to add contrast to the image and also a sense of menace that should accompany a shark, although this one was only 2 feet long.


3. Hard Coral on the reef, but imaged against an open water blue background - I did not manage to fully frame this as I wanted, I envisaged it as a macro shot, however, the explosion of fish from the coral against the blue background makes for a dynamic image.  The blue is still too green, I will correct that later


4. Repetition of form in scholling fish - this was taken whilst snorkeling in the lagoon, I like the play of light on the fish school.


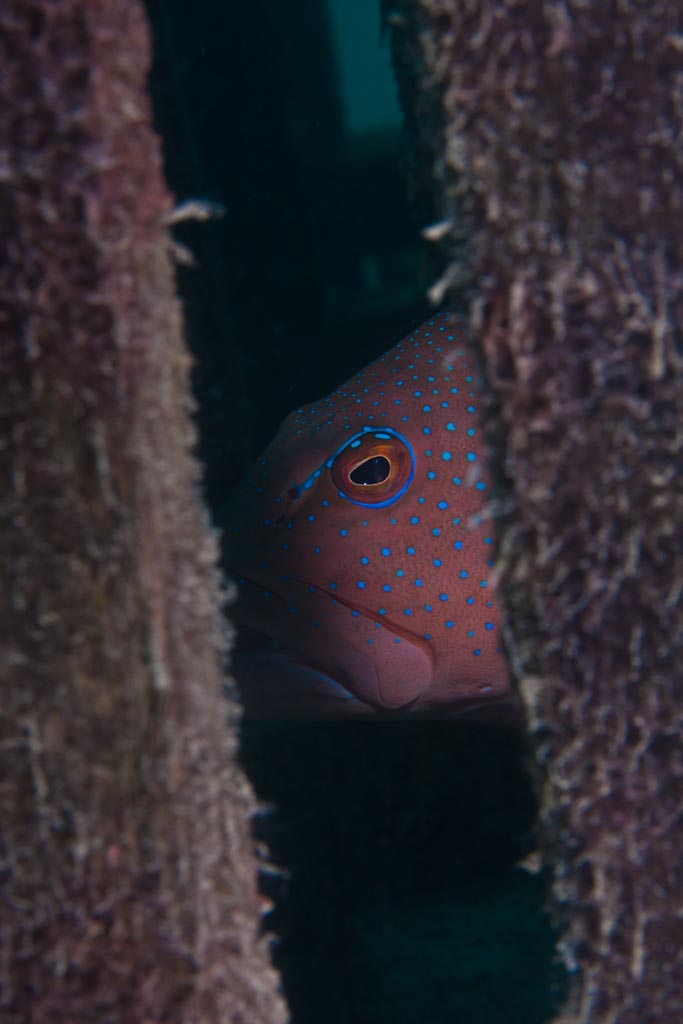
5. Light filtering through wood under a pier - I was not able to achive what I really wanted here, the light never achieved the quality I wanted:
  

6. UW landscape of sand - kind of dessert image, but underwater.  I am very interested in this image and a few others very much like it


7. A sea fan (Gorgonian) shot with a blue water background - very striking and not easy to achieve.  Again colour balance is not complete, however, the small fish adds point interest and context to this Gorgonian


8. Something very cute- clown fish.  OK, I know, however, they are very hard to photograph well, as they never stop moving (part of the reason I shoot so many frames)


9. A fish face, very close up image of a fish possessing strong character. This beautiful, yet ugly Jaw Fish possesses a similar character to a bull dog.


10. A B&W study of coral shapes and form - I am not sure how well this works, the form is interesting, but is it an interesting enough photograph


11. A diver to add some context to the image set - similar to the sand image, this shot from the lagoon of Heidi hanging in inner space attracts me very strongly


12. A boat from below - This shot shows a group of divers having just entered the water beginning their descent.  It is a good context shot and one I am pleased with.


13. Use a red filter to balance the light attenuation and create a very colourful edge of reef shot - no chance, the light and visibility were too bad to use a red filter on this trip.

14. Try working with 2nd curtain flash and drag the shutter when photographing moving fish - create a sense of movement.  This also did not work as I could not get my Ikelite strobes to 2nd curtain sync, the camera would only permit non Canon strobes to first curtain sync.  However, I still like the effect created, it has a sense of movement lost in most conventional shots.


15. Focus in on a detail of a fish , such as the eye or teeth - This simply works for me


16. Work up some images with a very black background in otherwise open water daylight conditions.  Creating a black background is pretty easy photographically, simply heavily under expose the image and use flash to light the foreground.  The trick is finding a subject with no background.  In this case a small fish on a whip coral.  These are extremely hard to shoot, as the coral is moving, i am moving and 2cm long fish is also moving.  This tests diving and photographic skills to the limit, but is great fun when successful.


So, I managed to obtain a good variety of shot and subject.  These images need a substantial amount of further processing, correcting colour castes and removing back scatter, etc.  As such these images are a good example of use of the skills involved in Digital Photographic Processing.  However, what I have is a divers set of images with no really coherent thread other than that they are all taken in and around Lankayan Island and are underwater images.  I am not satisfied with this approach and want to present something more coherent that captures an element of the underwater world.  I will develop this idea further in my next blog entry

Assignment 5: Initial Thoughts

Although I have now returned from the trip to Borneo, I used my notebook to record ideas as I travelled to the destination, here I transcribe those to illustrate my thought process as I worked up ideas for the content:

My first thoughts were to create a series of individual shots that illustrate the learning that I have taken from DPP and how I have applied it to underwater photography. To this end I prepared the following shot list to try and accomplish during my stay on Lankayan Island (in no particular order):

  1. Nudibranch (sea slug) - Shallow Dof
  2. Shark in shallow water, perhaps as a B&W image
  3. Hard Coral on the reef, but imaged against an open water blue background
  4. Repitition of form in scholling fish
  5. Light filtering through wood under a pier
  6. UW landscape of sand - kind of dessert image, but underwater
  7. A sea fan (gorgonain) shot with a blue water background - very striking and not easy to achieve
  8. Something very cute- clown fish...
  9. A fish face, very close up image of a fish possessing strong character
  10. A B&W study of coral shapes and form
  11. A diver to add some context to the image set
  12. A boat from below
  13. Use a red filter to balance the light attenuation and create a very colourful edge of reef shot
  14. Try working with 2nd curtain flash and drag the shutter when photographing moving fish - create a sense of movement
  15. Focus in on a detail of a fish , such as the eye or teeth
  16. Work up some images with a very black background in otherwise open water daylight conditions
Given that I need 10-12 images this first set of ideas would supply sufficient variety.  The issue that I have with this concept is that there would not be a great degree of cohesion between the images, other than commonality of location and the fact that all shots are made underwater.  However, it would be a good demonstration of skill and capability if it works.

An alternative view would be to theme the image set around one of the following:

  1. Nudibranch's - these colourful sea slugs make for fascinating subjects
  2. Portraits - a series of close up images of the faces of underwater animals
  3. Sharks/Rays - a study of the larger animals in the surrounding reef system
  4. Landscape - a series of underwater landscape shots showing the diversity and structure of the reef ecosystem
  5. A calendar for the island - treat the assignment as if I had been asked to create a calendar for the island
  6. A study of underwater light and texture
To a large extent my ultimate selection will depend upon the availability of subject and success in shooting.  A major equipment failure could result in no images at all and a return to an above water concept for assignment 5.

Sunday, May 1, 2011

Assignment 4: Tutor response

Overall feedback was positive, although with some good suggestions for improvements.  Interestingly to me, my tutor felt that the first "star Wars" image conforms to the "Real or Fake" requirements as the models were convincing enough to appear real.  The main recommended change was to add an author, in this case my name:


So, in hindsight I did not need to produce a second composition, however, I am glad I did and I view the 1984 concept as by far the more convincing image.  The recommended changes for this image were:

  • To re-frame the image for a more symmetrical comp.  This I have done, however, it forced a change in the image aspect ratio as the original image had too little negative space around the central content.  Generally I want to get images correct in camera, however, this type of exercise really needs some space around the subject to enable some freedom in framing.  As I was using a prime lens on my camera, and had a very limited freedom of movement I could not adjust this at time of shooting
  • To make the central Stalin opaque.  This improved the strength of the image and did reduce confusion in the center of the picture.
  • I have added the authors name
  • It was suggested that the two "Men in Black" on the stairs were barely visible.  I have not moved them, however, I had two shots with these men in view and so have cloned two sets of these men into the frame.  This adds some extra menace in a group of similarly dressed men ascending towards Big Brother
  • When I processed the image this time, I have changed the shade of blue in the split toning to something a little darker

All in all a good learning experience and an eye opener in terms of how easy it is to severely manipulate an image in this way

Assignment 5: Planning

Much of DPP looks at the overall issues of workflow in photography.  For a diving trip workflow is critical and starts with the pre-travel preparation.  Underwater photograph, particularly with a DSLR is a demanding activity and requires a considerable amount of equipment, in my case:

  • 2 x Canon EOS 40D (always have a spare body, sea water kills cameras)
  • 60mm Macro
  • 10-22mm WA Zoom
  • Batteries, Chargers
  • Memory cards - I take an 8GB for each days diving, I do not earse them until I return to home
  • Laptop for downloading cards
  • external HD for back - this way I have 3 copies of every photograph
  • Underwater Housing - Mine is an Ikelite, made from tyrasnparent plastic, very handy for seeing if any water has entered the system
  • Flat port for Macro and Dome port for wide angle - each lens must have a separate port on the housing
  • 2 external strobes with 125J each, underwater photography requires a lot of light, these are considered small strobes even though each weighs around 1Kg
  • Arm system to enable me to position the strobes underwater
  • Tool kit to enable simple repairs
All of this has to be assmebled and carefully checked before getting on the plane.  In addition I have a 15-85mm and 70-300 zoom for above water work.  Added to this is a second system for HD video that my wife uses, less weight than my system but still quite bulky.

This is my camera system laid out in preparation to pack - I always arrange the system on a table to mentally check that I have everything


The second aspect to planning an underwater photography trip is contemplation of subject and the style of image that I wish to achieve.  I have been shooting underwater with an SLR for over 5 years and am technically an accomplished shooter, however, ost of my work is very much orientated towards accuracy and detail.  My great joy is macro frequently working at 1:1 magnification and often f/22 or even smaller apertures.  This yields often impressive results, e.g.


but can be a little too precise.  In the above image the background is black because I have shot with a very small aperture and the only light reaching the sensor is from the strobes.  I do like this image and it was part of my Assignment 5 submission for TAOP, but it is of a certain style.  recently I have experimented with very shallow DoF and wide apertures, yielding a much better rendition of the water and an almost dreamy look to the image:


This takes some care as placing the focal point is critical to the success of the image. 

These two images are successful underwater macro shots, however, the second has a better feel to it.  My goal on this trip will be to further develop this style applying it also to larger subjects such as schools of fish.  I also plan to experiment with dragging the shutter on moving subjects to try and obtain a sense of movement in the images.

The photographer I hope to emulate (to some extent) is David Doubilet, regularly featured in NAtional Geographic, but also one of the most sensitive underwater artists.  He frequently works in B&W and creates some truly dramatic imagery

http://www.daviddoubilet.com/default.asp

The destination for our trip is the Sulu Sea between Borneo and the Philippines.  This is priamrily a macro destination, so I expect to most often be using my 60mm macro.  However, the island we are visiting is the home of a number of large schools of fish so I hope to combine some wide angle work as well.

The goal for this trip will be the publication of a book of underwater images produced as an art photo book, rather than a holiday album.  I use Blurb to publish my books and have been very happy with the quality of their work.  I do not expect to include this in my submission for the course, but it is an option. 

For the course I plan a series of 10-12 prints, each using different techniques in capture and processing, illustrating my learning in the course, but also (I hope) conveying my passion for diing and the art of underwater photography.

Friday, April 22, 2011

Assignment 5: First Thoughts

Now that Assignment 4 is on its way to my tutor, I turn my thoughts towards the final assignment.  The Assignment offers complete freedom of subject simply specifying a personal project.  I am not entirely happy with this, I prefer a closed rather than open task, however it is what it is!

A successful submission needs to demonstrate two things:
  1. That I can apply all that I have learned from the course
  2. Artistic development
For the former I need to produce a set of images that reflect good workflow, combination of colour and monochrome, and a judicious use of manipulation to improve quality and perhaps message.  For the latter I need to demonstrate (to myself especially) that my skill in developing a concept and delivering entertaining or challenging work has made a step forward.

To date my focus in the course has been the development of skills in portraying the urban environment, primarily from a landscape ethos.  I have consciously taken this route as I expect my next step to be the Landscape Level 5 course.  I am using this course to develop skills that will be useful later on.  With this in mind two subjects present themselves as possibilities for this assignment:
  1. The Legacy of the Olympics: Munich hosted the 1972 Olypmpics, famous for Mark Spitz and infamous for the terrorist attack on the Israeli athletes.  However, the facilities created 40 years ago are still in constant use and are a much loved part of Munich's landscape.  A photographic study of the arenas and housing would make for an interesting and challenging assignment that aligns well to the upcoming London event.  I just hope London is able to enjoy its legacy as much as Munich
  2. Shadows of Evil: Munich is a very beautiful city with a very liberally minded population.  This was once very different, in the 1930's the city was the origin of the greatest evil yet to plague the Human race.  All over the city there are reminders of this past and its affect on the city, from the monuments of the Nazis to the mountains of rubble from bombed out buildings, you cannot escape from the negative legacy of Hitler and hist party.  The challenge in such a study would be to present a coherent and meaningful set of images, many of the places once frequented by the Nazi party are now erased.  However, the city still has shrapnel holes in buildings, ugly Ack Ack towers, and strangely just around the corner from where I live is the house that Hitler bought for Eva Braun to live in!
Both of these concepts interest me very much, I have already worked up some ideas for the Olympics as part of People and Place


Both of these ideas are high on my list of future projects and would work well in the Landscape or Social Documentary courses respectively.

An alternate and one I am strongly drawn to would be to return to Underwater Photography.  When I first set out with the OCA my goal was first and foremost to improve my compositional skills when shooting whilst Scuba diving.  This is most likely the last opportunity for me to see how my skills have improved in the context of the courses, Underwater Imagery might work as Landscape, but Social Documentary of Shrimps is not likely to fly.  

In two weeks time I leave for a two week diving vacation in Northern Borneo, expressly to take photographs.  We will be diving the Sulu Sea between Borneo and the Philippines, an area renowned for Macro subjects, but also offering some wide angle potential, especially some of the larger sharks, such as Leopard and if very lucky Whale.  At the end of my Art of Photography course I used a similar diving trip as a narrative, this time the goal would be much more towards the fine art side.

http://sclarke-blog.blogspot.com/2010/06/assignment-5.html

I will in any case publish a Blurb book to document the trip, this time I am intending to produce something more in the David Doubilet line than my usual photo narrative.

I am very serious about underwater photography, although this is now not so much an obsession as it has been joined by any number of other photographic quirks.  My kit consists of two Canon EOS 40D 10MP APS-C sensore cameras, a 60mm Marco, and 10-22mm zoom.  I can also use a 100mm macro, but I find this is too long when used with a crop sensor camera and have the option of using my 17-40mm zoom (good shark lens).  All of this is housed in an Ikelite Acrylic housing with flat port for Macro, Dome port for Wide angle, and a pair of TTL 125J Strobes.  This is me with my kit annoying a pair of lion fish


I feel this would be a better test of my progress and a return to my photographic roots, the risk is that Underwater Images are not always viewed as art.  Then again, making them into art might be the challenge.  I have never processed into Black and White and also much of the colour management in this course could be applied very nicely to the often irritating colour castes in underwater images.  As a parting shot here are a few of my own favorite underwater images.  Question is, can I do better?  I am sure I can!


Singapore

A couple of weeks ago I had the good fortune to have an excuse to spend a long weekend in Singapore, one of my favorite cities.  My wife was there on a business trip and I had enough Lufthansa miles for a very low cost fare, so 4 full days in Singapore for little more than 300 pounds, jumped at the chance.  I did spend a day in HP's Singapore office as I also had some people I could usefully meet, however, my primary goal was to have 3 or 4 days free with my camera to explore the city and try to capture something of its' essence.

I was also giving my new Samsung NX100 mirrorless compact camera a good try out.  Although I love my DSLR's and lens collection, the weight and bulk can be a challenge especially when traveling.  As a result I have been looking for something lighter and smaller, but offering the versatility of an interchangeable camera system.  A Leica is out of the question for any number of reasons.  The Samsung appealed as it sports an APS-C sensor and there are a couple of really nice pancake lenses available for the system, a 20mm (30mm FFE) f/2.8 and 30mm (45mm FFE) f/2.0, both fast and very sharp.  To this I have added a 50-200mm zoom and an EVF so that I can avoid framing using the display screen in extreme light (i.e. Singapore).  Together with a flash, battery charger, spare batteries, POL filter, and a few other bits and pieces this fits in a camera bag which would just about hold my Canon 5D2 and single lens.  To cap it all my wife bought me the body, kit lens, 30mm lens, and flash as an anniversary present.

The only downside of the system at present is the rather limited lens selection especially at the extreme wide end, however Samsung will shortly release a 16mm (24mm FFE) f/2.5 pancake which will nicely round out my kit.  With the prime lenses the quality is very good, and the sensor can handle ISO to about 800 before noise becomes a real issue.  I also get the impression that Samsung plans to be a major player in the mid-range market, leaving the DLSR's to Canon/Nikon, but seriously competing with Sony, Olympus and Panasonic in the EVIL technology space.  I suspect they will do rather well and it will be good to have competition for the usual suspects.

This was my kit for Singapore...

I planned to simply wander the streets and see where my muse took me, no goals, no assignment, just me and my camera - be a flaneur for the day.  This, however, might have been great in Paris, but in the tropical heat (+30 in the shade) I rapidly wilted and my ambition had to be curtailed.   Photographing early in the morning was not really an option, jet lag saw to that and I also wanted to have some fun, not simply exchange work at my computer for work with a camera.  Evenings proved very fruitful, however, the sun moves quickly on the equator so I had to work fast.  Landscape was also limiting, the air is so wet that haze obscures much of the distance, a useful feature in some situations, but I can see why Hong Kong is more popular for city scape photographers.

After the weekend I did not leave with a unifying theme, rather a series of images that coalesced around a number of ideas:

  1. Architecture - I cannot resist it and am finding this might be my genre
  2. Old and new - Singapore is constantly being rebuilt, often with little regard for history
  3. Night Life
  4. Interiors
  5. Street Life
I still found myself nervous about shooting "Street", although the discreet little NX100 really helped not to draw attention to myself.

Starting with architecture here are the best of what I shot:


These two are pretty conventional high rise shots, but I am still very pleased with the abilities of a simple camera to take such clean shots (both use the 20mm)


This was taken from the top floor of a skyscraper hotel and shows the Singapore theater complex, looking like the eyes of a giant bug with the new Sands Hotel, Leisure and Shopping complex behind.  The challenge with this shot was to manage the reflections in the window and to frame in an interesting manner, I hope I succeeded.


The final two shots are taken at the base of the Sands hotel development, a very strange architecture, but offering interesting juxtapositions to the city.

Moving onto Old and New, Singapore offers quite dramatic juxtapositions of traditional Chinese buildings with  the Glass and Steel of the financial district.  As I walked around I felt a sense of the destruction of the old by the new, in particular it felt sad that the banking system that has caused so much pain in the world recently still has the arrogance to crush history to make more money.


Of these the second seems very sad to me, this traditional shop house appears about to be eaten up by the emotionless buildings behind it.

However, Singapore is a vibrant city that comes alive at night, a vibrancy that is fueled by the money pulled in by these buildings.  The ultimate contradiction is that the charm that makes Singapore is effectively destroying itself.  The following photos really reflect the colour of the area around Clarke Quay and also demonstrate that the NX100 can handle low light and colour pretty well, all photos are hand held.


I also took some twilight landscapes of the river area, somewhat more conventional:


Shooting in the evening once the sun went down was a pleasure, doubly so as there was always a bar with ice cold Tiger beer nearby, although a second mortgage would be needed to get a skinful.  during the day I was increasingly driven inside by the heat, but then again, Singapore is an inside out city, much of the colour and structure is indoors and even deep underground as people only spend any time outdoors at night.

The first two shots are of two very different shopping centers, the first is Funan, 6 floors of computer and camera shops, very tempting but also fun to photograph:


The second shot is the Sands complex, very high end shops and really insane architecture.  It feels like being inside the metal skin of a Zeppelin.  Another obsession of mine, other than buying lenses, is photographing underground railway systems, these two images are taken at the Dhoby Ghaut interchange:


I did get reprimanded taking the second of these, I still find it odd that officialdom is scared of people photographing railway stations, especially in the age of the 8MP camera phone.  The people they need to worry about are not likely those who take images very ostentatiously!

My final selection of shots is themed around street life, the original objective for all of the images, but one that I had to curtail due to heat and an ongoing nervousness about shooting people without their permission.  I start with a couple of shots taken in the canyons of the financial district


I particularly like the first photo, with its splash of colour and the foreground presence of an office worker passing by.  I also spent some time in the backstreets of China Town, trying to capture the "real" Singapore, whatever that is, but also creating some juxtapositions and layered images:


I also captured a few odd shots:


Finally I have three photographs that don't really fit into any of these themes, firstly a football game


And to think that I was struggling to take photographs, these guys must have been melting.  


This is a favorite building very colourful, the Porsch passing by just adds to the colour and wealth that is Singapore.

My parting shot was taken out my hotel window after nightfall using a tripod and long exposure.  They never stop building in Singapore, night and day there is activity.


This was a good visit, but not as productive as I would have wished, however, I enjoyed taking the photographs and learned a lot.  This was the first time that I thought about a short trip such as this as an assignment and worked hard to produce a variety of images that capture the spirit of the city.  I hope I succeeded.