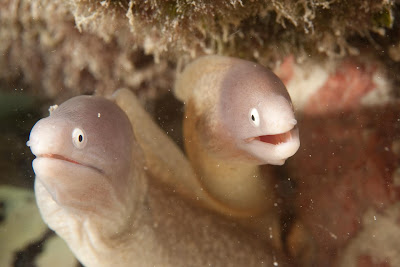
However, there are occasions when the image is very badly affected, but the subject is of sufficient interest that this becomes a major task. One such image is the following, a pair of white eye morays, rare individually, but very unusual to find tow together. Compositionally a fine image, but the noise, oh boy!
Clearly an image in much need of improvement, WB, contrast and crop being the start. The next frame shows the image part way through the process, highlighted are all the dust spots I have removed:
And the final image - major improvement
Thus coming to the image that OCA provided, I was quite familiar with the tools. The challenge with this image, as with the Eels as well, is what to remove. In the case of the provided image, there were artifacts that clearly were part of the soaps, I left these alone.
The other provided image was more of a challenge from a technical perspective, but also from an ethical standpoint. Unless there really was a very strong business reason to correct this image I would not do so. I prefer to get this type of issue right in the camera, use of the replay function can quickly reassure that a photograph is badly affected by flare. Having said that I did the job as a useful learning exercise
My first attempt used the same tool set within Lightroom to clone out the flare. I essentially built the wall underneath the flare upwards to replace the artifact after using some colour correction to reduce the colour affect. This process changed the tonal balance of the shot and so is not so useful in all cases
In my second attempt I have used the clone tool in photoshop set to Colour or Darken and slowly chipped away at the polygons until they were gone. This preserved the structure in the shadow, but was far more time consuming.
In both cases it helped to have a very low resolution image in which detail is difficult to discern. The change left quite rough edges in places.
Again, I would either accept a flare as part of the photograph or rework the image on location to remove it at the time of shooting - I think this is a step too far.


No comments:
Post a Comment